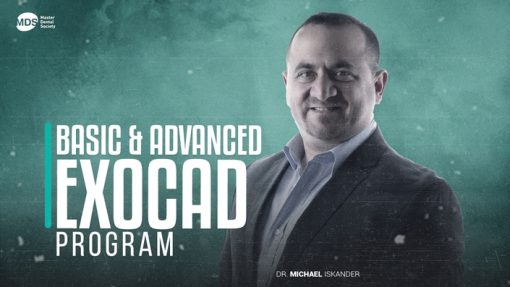
Basic and Advanced Exocad Program (Course)
15 $
Basic and Advanced Exocad Program
Basic and Advanced Exocad Program (Course)
Master the Exocad Program with Dr. Michael Iskander’s Comprehensive Video Tutorials
If you want to become an expert in Exocad Program as a dental practitioner, then Dr. Michael Iskander’s collection of video tutorials may just be what you need. From foundational skills to advanced techniques, his tutorials cover everything you need to know. In this article, we’re going to explore Dr. Iskander’s videos, so you can find the best ones that will help you improve your skills.
1. Basic Exocad Program – Dr. Michael Iskander
This video tutorial is perfect for those who have no previous experience with the software. Dr. Iskander’s tutorial covers everything you need to know, from the program’s basic introduction to material selection and database preparation. This 1 hour and 23 minutes-long video is great for beginners who want to learn the basics.
2. Inlay, Onlay & Veneers – Dr. Michael Iskander
If you want to master the design of inlays, onlays, and veneers, this video tutorial is the way to go. It covers the different modules of the software, the design process, and correct pre-operative scan position. Dr. Iskander’s tutorial even includes a section on free-forming, and the video runs for 43 minutes.
3. Bridge (Basic Exocad) – Dr. Michael Iskander
The Bridge (Basic Exocad) tutorial is ideal for dental professionals who want to learn how to design bridges using the software. It covers different modules of Exocad program, virtual articulator, anatomy of the teeth, and generating crowns. It also includes a section on free-forming and tips on the basic modules. This tutorial is 1 hour and 22 minutes long.
4. Implantology – Dr. Michael Iskander
The Implantology tutorial is just what you need if you want to design implant-supported restorations. Dr. Iskander covers the job definition, detecting implant position, generating abutment buttons, and customized abutment without scan body. This 1 hour and 25 minutes-long tutorial is a must-watch for any dental professional.
5. Simple Screw Retained Restoration Design and Full Arch Screw Retained Restoration and Designing of Virtual Gingiva – Dr. Michael Iskander
The Simple Screw Retained Restoration Design and Full Arch Screw Retained Restoration and Designing of Virtual Gingiva tutorial provides two different topics in one video. The video is split into two parts: Simple Screw Retained Restoration Design and Full Arch Screw Retained Restoration and Designing of Virtual Gingiva. This 1 hour and 12 minutes-long tutorial will be perfect for those who want to learn both topics.
Conclusion
Thanks to Dr. Michael Iskander’s video tutorials, mastering the Exocad Program can now be an enjoyable and straightforward task! These tutorials are going to improve your skills, and whether you are a beginner or an experienced Exocad user who wants to learn the newest techniques, you’ll find them useful. So, get started by watching these videos today, and take your dental practice to the next level!
TOPICS
Basic and Advanced Exocad Program

Basic Exocad - Dr Michael Iskander

Start 1.1 Introduction Exocad (0:21 )

Start 1.2 Overview On Exocad (2:35 )

Start 1.3 Database Of Exocad (11:54 )

Start 1.3.2 Material Selection (5:44 )

Start 1.3.3 Options And Parameters (4:59 )

Start 1.3.4. Database Preparation (8:33 )

Start 1.4. Basic Skills In Exocade (8:34 )

Start 1.4.2. Crown Buttons (17:52 )

Start 1.4-3. Free-Forming (11:35 )

Start 1.5. Different Skills In Exocad (10:44 )

Start 1.5.2 How To Make The Position Of The Tooth Good (15:41 )

Start 1.6. Shrinkage (9:26 )

Start 1.7. Summary (1:23 )
Inlay,Onlay & Veneers - Dr. Michael Iskander

Start 1.1 Introduction inlay and onlay (0:21 )

Start 1.2 Different Module ( inlay and onlay) (11:07 )

Start 2.1. Introduction Veneers Module (0:21 )

Start 2.2 Different Modules (Veneer) (1:10 )

Start 2.3 Design's Steps (12:20 )

Start 2.4 Correct Pre-Operative Scan Position (3:29 )

Start 2.5 Free-Forming (5:44 )
Bridge (Basic Exocad)- Dr. Michael Iskander

Start 1. Introduction-1 (0:22 )

Start 2. Different Module In Exocade-2 (6:25 )

Start 3. Virtual Articulator-3 (11:07 )

Start 4. How To Use The Articulator-4 (3:58 )

Start 5. Anatomy Of The Teeth (Simple)-5 (10:13 )

Start 6. Anatomy Of The Teeth (Chain Mode)-6 (9:40 )

Start 7. Generating Crowns ( The Step Of Free-Forming)-7 (16:59 )

Start 8. The Connectors-8 (9:05 )

Start 9. Some Tips In Basic Modules-9 (4:17 )
Implantology - Dr. Michael Iskander

Start 1. Introduction--1 (4:13 )

Start 2. Job Definition--2 (11:03 )

Start 3. Detect Implant Position--3 (21:15 )

Start 4-Copy And Placement Of The Tooth--4 (3:02 )

Start 5. Generate Abutment Buttoms-5 (14:38 )

Start 6. Secondary Insertion Direction--6 (12:25 )

Start 7. Crown Buttoms--7 (4:06 )

Start 8. Customized Abutment Without Scan Body ( Manual Position )-8 (9:46 )

Start 9.The Process Of Customized Abutment Manually-9 (15:40 )

Start 1. Introduction, Outline And Definition-4 (3:15 )

Start 1. Simple Screw Retained Restoration Design 1-1. Introduction-5 (4:59 )

Start 1-2. Design 1-2.-1. Design - Material And Positioning--3 (6:02 )

Start 1-2-2. Design - Abutment Buttoms And Adjusting The Crown's Emergence Profile, Free Forming Phase, Shrinkage And Multi Level Cut-Back-1 (6:06 )

Start 1-2-3. Design - Screw Hole Design Of Single Restoration And Framework-2 (6:06 )

Start 2. Full Arch Screw Retained Restoration And Designing Of Virtual Gingiva 2-1. Options And Parameters-14 (9:30 )

Start 2-2. Alignment Or Seating And Start Smile Creator--6 (4:27 )

Start 2-3. Design 2-3-1. Emergence Profile And Teeth Placement-9 (6:39 )

Start 2-3-2. Design - Abutment Butoms, Free Foarming, Distance To Gingiva And Adaptation To Pre-Op Scan-7 (4:49 )

Start 2-3-3. Design - Virtual Wax-Up Bottom-8 (4:29 )

Start 2-4. Gingival Design-10 (4:36 )

Start 2-5. Shrinking-11 (3:49 )

Start 2-6. Connectors-12 (2:59 )

Start 2-7. Free Forming On Whole Meshwork, Screw Hole Design And Expert Mood Usage-13 (7:24 )
Related Products
Dental Ebook And Video
Guida alla riabilitazione implantoprotesica del mascellare posteriore atrofico pdf
Dental Ebook And Video
Oral Anatomy, Histology and Embryology, 6th edition (Original PDF from Publisher)
Dental Ebook And Video
gIDE ondemand lectures – Edentulous Patient Implant Placement and Restoration
Dental Ebook And Video
gIDE ondemand lectures – The Art and Science of Surgical Crown Lengthening
Dental Ebook And Video
Structural Analysis of Tooth – The Concept of 4 C’s by Dr. Pratiek Gupta
Dental Ebook And Video
SPEAR Using Models To Evaluate and Treatment Plan Occlusal Issues – Frank Spear
Dental Ebook And Video
B.O.P.T. сoncept encyclopedia. For prosthodontists and dental technicians
Dental Ebook And Video
Precision in Laminate Ceramic Veneers: Tooth Preparation and Adhesive Cementation Techniques
Dental Ebook And Video
OHI-S Contemporary Advances in Implantology New Materials and Updated Protocols
Dental Ebook And Video
Tomorrow Tooth & OHI-S The 6 Elements of Orofacial Harmony – Lawrence F. Andrews
Dental Ebook And Video
OHI-S Implant-Retained Dentures Innovative Approach to Full-Arch Prosthetics
Dental Ebook And Video
RBB MasterClass,How to Succeed with Resin Bounded Bridges-Jazz Gulati
Dental Ebook And Video
Dental Ebook And Video
OHI-S Centric Relation, all Methods of Registration & Clinical Application
Dental Ebook And Video
Dental Ebook And Video
OHI-S Occlusal Compass Concept: Laboratory Protocols for Functional Rehabilitation
Dental Ebook And Video
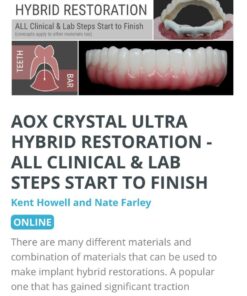
AOX Crystal Ultra Hybrid Restoration: All Clinical & Lab Steps Start to Finish
Dental Ebook And Video
Dental Ebook And Video
Innovative Dental Marketing Ideas to Grow Your Practice – Gayle Reynolds
Dental Ebook And Video
OHi-S Biomechanics of the Mandible – Davis Thomas Accurate Diagnosis for Successful TMD Treatment
Dental Ebook And Video
Dental Ebook And Video
FMR – Full Course – Dr. Moez Khakiani (New online version with 2024 updates)
Dental Ebook And Video
OHI-S Musculoskeletal Physiotherapy Techniques in Orthodontics – Tzvika Greenbaum
Dental Ebook And Video
Dental Ebook And Video
Digital Hybrids for Dentists and Technicians Enjoy Tutorials with Exocad
Dental Ebook And Video
OTEXE A Course on Damon Ultima: Bracket System: The System’s Creator Dr.Dwight Damon
Dental Ebook And Video
Southwest Society of Oral and Maxillofacial Surgeons Combined Annual Meeting 2023
Dental Ebook And Video
Osteocom Implant Prosthodontics, from Planning to Restoration – David Powell


